How to Make a Retro Game Console With Raspberry Pi - Here’s What I Discovered 2026

Creating a retro game console using a Raspberry Pi has become one of the most rewarding projects for gaming enthusiasts and tech lovers alike. As someone who’s built multiple gaming rigs and dived deep into the retro gaming scene, I can attest to how this simple, affordable device can transform your gaming experience by letting you revive classic titles from the ’80s and ’90s—all from one compact box. Whether you’re a nostalgic gamer wanting to revisit beloved classics or a DIY hobbyist eager to learn about hardware and software integration, this project provides the perfect mix of fun and tech.
In this article, I’ll guide you through how to turn a Raspberry Pi into a powerful retro game console, covering everything from choosing the right model and installing the necessary software to configuring controllers and optimizing your setup for the best performance. You’ll also find tips on sourcing games legally and how to customize your console to create a truly personalized gaming hub. By the end, you’ll have all the knowledge to craft your own collectible, fully functional retro gaming system. Let’s dive into the technical details, proven tips, and insider hacks for a seamless build.
Handheld Retro Consoles | Shop Now

Retro Game Nintendo Cartridge | Retro Game Sega Cartridge | Retro Game PlayStation | Retro Game Xbox | Retro Game Atari Cartridge | Retro Game PC DOS Classics | Retro Game Arcade Console | Retro Game RPG Cartridge | Retro Game Racing Cartridge
Why Use Raspberry Pi for Retro Gaming?
The Raspberry Pi is ideal for a retro gaming console for several reasons: its compact size, affordability, and vast community support make it a go-to for DIY consoles. Thanks to software like RetroPie, you can emulate dozens of classic systems, from Atari and NES to Sega Genesis and PlayStation 1—all on one device.
Choosing the Right Raspberry Pi Model
I recommend opting for at least a Raspberry Pi 4 model with 4GB or 8GB RAM for smooth emulation. Older models can work, but performance may lag on more demanding games. The Pi 4’s improved CPU and GPU capabilities handle high-resolution display output and more complex consoles effortlessly.
Additional Accessories You’ll Need
-
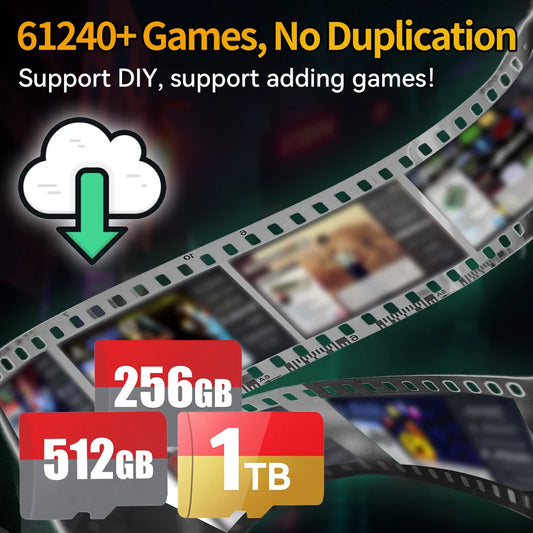
MicroSD card (32GB or more, Class 10 recommended)
-
USB or Bluetooth game controllers
-
HDMI cable for display
-
Power supply (official Pi 4 power adapter preferred)
-
Keyboard and mouse for setup
Plug & Play Retro Consoles | Shop Now

Retro Game Fighting Cartridge | Retro Game Sports Cartridge | Retro Game Puzzle Board Cartridge | Retro Game Sega Boxed US | Retro Game Sega Boxed JP | Retro Game Sega Boxed EU | Retro Game Sega Boxed RU | Retro Game 16 Bit Sega | Retro Game Sega Box Manuals | Retro Game Famicom Card
Installing RetroPie: Your Gaming Software Hub
RetroPie is the software cornerstone of your retro console. It packages emulators, front-end menus, and configuration tools in one easy installation.
Installation Steps
-
Download the latest RetroPie image from the official site.
-
Use software like Balena Etcher to flash RetroPie onto your MicroSD card.
-
Insert the MicroSD into your Pi and boot it up.
-
Follow the on-screen instructions to configure your controllers and network.
Atari Retro Consoles | Shop Now

Retro Game Portable Consoles | Retro Game Handheld Systems With Built | Retro Game Plug And Play Consoles | Retro Game Sticks | Retro Game Raspberry Pi Consoles | Retro Game All In One Consoles | Retro Game Wireless Consoles | Retro Game Emulators | Retro Game Emulator Consoles | Retro Game Hard Drives
Configuring Controllers & Display Settings
A big part of the gaming experience is using the right controllers. Many USB and Bluetooth controllers are compatible, but I usually go for classic-style controllers like the 8Bitdo SN30 Pro for authenticity and comfort.
Adjust your resolution and display settings within the RetroPie menu to avoid lag and get crisp graphics on modern TVs or monitors.
Adding Games Legally and Managing ROMs
One of the biggest questions I get is about sourcing games legally. While emulators are legal, downloading ROMs (game files) can be a legal gray area.
Tips for Legal Gaming
-
Purchase original cartridges or discs and create your own ROM backups.
-
Look for collections or classic game compilations sold on digital platforms.
-
Avoid downloading ROMs from suspicious websites to protect your system from malware.
Sega Retro Games | Shop Now

Retro Game NES 8 Bit 72 Pin Card | Retro Game NES SNES | Retro Game Sega Genesis Mega Drive | Retro Game Nintendo 64 GameCube | Retro Game PlayStation 1-2 | Retro Game Atari Consoles | Retro Game Classic Mini Consoles | Retro Game Boy Advance | Retro Game PSP PS Vita Classics | Retro Game Best Handheld Console
Customizing Your Retro Game Console
You can personalize your setup by:
-
Installing custom themes for RetroPie to match your style.
-
Adding cartridge-style cases or enclosures for a nostalgic look.
-
Setting up save states and shaders for enhanced gaming experiences.
PlayStation Retro Games | Shop Now

Retro Game Controllers Accessories | Retro Game Storage Box | Retro Game Gameboy GBA Parts | Retro Game Console Dismantling Tools | Retro Game Nintendo NDS 3DS Accessories | Retro Game PSP Accessories Parts | Retro Game Neo Geo Pocket Accessories Parts | Retro Game Console Shell Parts | Retro Game Replacement LCD Screen
Troubleshooting Common Issues
Every build has snags. Here are quick fixes for frequent problems:
-
Controller not recognized: Re-pair or check RetroPie’s controller configuration menu.
-
Display lag or black screen: Verify HDMI connections and resolution settings.
-
Emulators crashing: Ensure you’re using the right emulator settings in RetroPie.
Wrapping It Up: A Fun and Engaging DIY Experience
Building a retro game console with Raspberry Pi is more than just tinkering; it’s a gateway to reliving your favorite gaming memories while learning valuable tech skills. The community around this project is extensive and welcoming, offering endless support and creative inspiration. With your own retro console, you'll have access to countless classics anytime, anywhere.
I encourage you to start with the basics—choose your hardware, install RetroPie, and connect your controllers. Experiment with settings and libraries, knowing that each tweak brings you closer to perfecting your personalized retro gaming station. Ready to bring those pixelated classics back to life?
Would you like me to include a step-by-step video tutorial guide or a detailed troubleshooting FAQ in this article?
Retro Games Collections
Retro Game Display Box | Retro Game TPU Sleeve | Retro Game Wonderswan Parts | Retro Game Acrylic Display Box | Retro Game Video Posters | Retro Game Video T Shirts | Retro Game Video Artwork Decor | Retro Game Board Card | Retro Game Toys Collectibles